...ideas and encouragement from my corner of the world on homeschool, parenting, party planning and beyond...


Monday, June 1, 2015

Whoa... It's time for a 5th birthday party! Super Hero style

Somehow, it's time for my baby's 5th birthday! Where has time gone?

This year, he wanted his party to be at the local gymnastics place, so mommy had to tone down the party craziness, but I still worked in a little fun.

The theme was super heroes, but we focused on Hulk and Captain America. We had green, blue and red juice barrels and Coke and Sprite since they were the right colors.

 For the Hulk section, we had green grapes and green veggie straws. Captain America got blue and red pretzel melts and blue tortilla chips. I also made different kinds of sandwiches and they each got a toothpick cupcake topper with a different hero.

 
Captain America's shield was made from strawberries and marshmallows with blueberries in the center and fruit dip in a star-shaped bowl I found in the candle section of Dollar Tree.

 
And, here's the cake!


Happy Easter!


Easter is one of my favorite times of year because we are reminded to talk about the amazing sacrifice Jesus made for us. If you are looking for more Easter activities or ways to share what Easter is about with your little ones, check out 1+1+1=1. Her resources are my favorite for almost every topic or occasion. You can also check out last year's Easter post here. Here are some fun ways we celebrated Easter this year.
 
I found these cute Some Bunny Loves You cards on Oriental Trading, but they could easily be replicated on your own. I added a cheese ball carrot and the boys gave these to their Sunday school teachers and friends. I also made some fun colored Wilton pretzels to go with them as well. If you want to know how to make these, check out the post here.


We had lots of fun coloring eggs!


And even visited the Easter Bunny!

 
Happy Easter!


Pretzel melts

If you ask anyone that knows me what I'm bringing to an event, they will almost always say pretzel melts. I. Love. These. Things. A friend taught me to make them a couple years ago and I make them for everythinggggg. I love them so much because they can go with the theme of whatever you are doing. These things come in every color and they are so easy to make my five year old can almost do them by himself. You can get them at Walmart or any craft supply store. You can see what you're looking for here. We make red and green for Christmas, match birthday party themes, use football shaped pretzels when they come out in the fall and just make them all the time!
Heat your oven to 300 degrees. Start with your melts and lay them out on foil. Put them in the oven for just a few minutes. If they look shiny, you're good to go.


Then pop on the pretzels.


Let them sit until they are hard and that's it. Seriously, so easy, so cute and so yummy too!

Soccer fun

This little cutie just finished up an amazing soccer season and Mommy had so much fun making snacks for his team!


We got to fix snacks two times this season and for the first game, I made these fun soccer guys. I got the idea from Pinterest here.

 
I used applesauce for the head, mini fruit roll-ups for the arms, raisin feet and soccer ball cupcake topper rings. I drew faces on the applesauce and glued everything together with hot glue. I attached a spoon to the back of the applesauce. Everyone loved them!
 
The second time we had snacks was the very last game of the season. I found blue boxes on clearance at Walmart and printed labels with each child's name. In the box, I took Oreo cookies and, with chocolate icing, attached soccer balls I found in the cake decorating section of our local craft store. We also added soccer gummies and a small bottle of water.


Both ideas were very easy and the kids loved them!

Easy borax crystals

My oldest is really interested in geology and crystals right now, so I thought we would try a simple crystal growing experiment. I liked this one because I am working with a four year old and a two year old, so patience is not rampant around here and you get results with this one fairly quickly.
 
We started with boiling water. I gathered jars, a funnel and a measuring cup. I gave them each pipe cleaners and let them form whatever shape they liked. I then took their shapes and tied them with string onto a pencil so they would be able to dangle in the jar.
 
 
 Once the water was boiling, we filled each jar with the water and they added their choice of food coloring. We then added borax until it would no longer dissolve in the water.
 
 
Next, they sat.
 
 
We began to see crystals form in around four hours, but the next morning, they looked like this!


For more information on why this works, check out Steve Spangler Science.

Valentine's Day fun

Valentine's Day is a fun opportunity to show Gods' love for us by doing special things for other people.
 
We made some quick store-bought crafts, painted heart hands and used an edible marker to write our own messages on conversation hearts.


I love to make special food for my boys on holidays, so I thought I would try some cherry turnovers for a special Valentine breakfast. I used a roll of crescent dough and rolled it out flat.


I added cherry pie filling...


and topped it with another roll of crescent dough.


I cut out a heart shape with a cookie cutter... 


and baked it at 350 for 30 minutes. My boys loved this and it was delicious too! Next time I will add a little less filling to get it to seal a little better.


Snowmen crafts

We have several families that we give Christmas gifts to and I always try to do mostly homemade. This cuts down on cost and also is hopefully something they will appreciate more than something store-bought.

I made this easy orange bread and paired it with these inexpensive jellies I found on Amazon.

We wrapped the bread and jelly up on these plates that we made. I bought the plates at the Dollar Tree for $1 each. I used acrylic paint and then baked them at 300 degrees for about an hour.

 
We also used the acrylic paint on these Dollar Tree ornaments to personalize them and included them in our gift bundles as well. I just painted their hands and had them cup the ornament and then used a Sharpie to add details.


Elf on the Shelf, Cabinet, Bathtub...

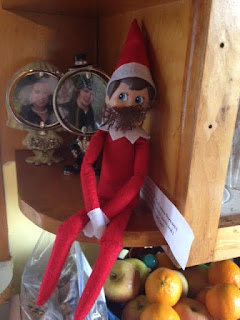
This is the first year that Dustin the Elf has visited us and I had so much fun with that little guy! I just wanted to share a few of the adventures he had while he was with us.

It is so important to me that my boys remember the reason for the season, so Dustin left them a little note each day letting them know what he was doing and reminding them why we were celebrating.

My tip to anyone else helping Santa's elves this year, is to plan ahead! I would not have been able to do fun stuff with Dustin if I hadn't made a plan. I typed out notes for each day and printed and cut them all on day 1. I also bought everything I needed in one trip so that I could pull it out on the day I needed it instead of making many trips.

The first day Dustin came to visit us, he brought a Christmas devotional with Lego and chocolate advent calendars.


Dustin was seen...
 
playing with tools...
 

taking a shower...


fixing himself a snack...


trapped in a Lego house...

 
making sugar angels...


getting into dry erase mischief...


taking a marshmallow bath...


doing a little Goldfish cracker fishing...


bowling with candy...


trying to look like Uncle Si...


getting a tan by the fire...


sneaking a candy snack...

 
playing in mom's jewelry box...


and tied up by naughty toys.


Here's to hoping Dustin made it home safely to the North Pole! Can't wait to see him again next year.

Penny family tree art

I am kind of obsessed with family tree art lately and I was looking for something simple I could do with my boys for my best friends and their grandparents. This was so simple and I think they turned out great! The hardest part was searching through their piggy banks for the right years. We couldn't find some of the oldest pennies, so I purchased them on eBay for around $1 shipped each.

We started by cleaning the pennies. We soaked them in around a cup of vinegar with a spoonful or so of salt added. Within a few minutes of swishing them around I was amazed at how clean they looked. I did read that this decreases the value of the coins, so don't use this method on anything you care a lot about.

 
I washed the pennies off in warm water and laid them out to dry.


I bought cheap frames at the Dollar Tree and scrapbook paper squares for the background. I used my hot glue gun to glue the pennies to the paper and then just laid them in the frame. This is the one I made for my best friend with her and her husbands' years at the top and their three boys below. I added the little heart sticker just for fun.

 
I love how easy these were and how special they were to the people who received them. I think they turned out great. Now to find time to make one for me! :)

Happy 2nd Birthday! It's a Dog Party!

For my middle baby's second birthday, we decided to throw him a dog party!

He loves all things dog, so to make his day extra special, we rented a super cute fire dog bouncy house.


To make the food simple, but fun, we created a Hot Dog Bar with all the toppings we could think of! I looked up specialty dogs and put suggestions on a card on the table. We served the food in dog bowls. I kept the hot dogs in a crock pot and cooked them standing up and down on low for four hours. I rotated them once during cooking and they turned out great and stayed warm for the whole party.


We served Toilet Water Punch to drink. The recipe was:

2 gallons blue Hawaiian punch
4 Liters Sprite

 
He had a Water Bowl cake and a Dog Food Bowl cake.
 
 
Our sweet neighbor also used cardboard and wood to create a dog house photo prop that was awesome!!


 We had a dog-gone good time!